How to Make Fun Review Games to Play With Your Classroom
It's clear interactivity and games are a valuable way to teach. So how do we engage students with fun review games? Here is a tutorial that will explain a step by step way to build one of these interactive games, without too much work or time from you!


On the rare occasions you can get a response from a high school student about how school is going, it's usually not the best. It’d be easy to write these concerns off by blaming hormones or a rebellious phase, but sometimes, the answer isn’t that simple. The Yale Center for Emotional Intelligence and the Yale Child Study Center recently surveyed 21,678 high school students and found that 75% of students' self-reported feelings about school were negative.
The most common emotion students experience is tiredness, with 58% of students reporting it. Similarly, another common emotion is boredom—a little less than 50% of students said they experienced being bored in class.
But these feelings aren’t limited to high school students. In general, when it comes to higher education, students feel bored a third of the time while in the classroom. And want to know why they feel so disengaged? It’s because most activities aren’t designed to interest them.
Students feel under-stimulated, disengaged, and simply aren’t interested in what’s going on in the classroom. Several studies have tried to uncover both the reasons why students are bored in the classroom, with some studies suggesting that students feel bored 1/3 of the time they’re in the classroom.
- Ric Sweeney, Why Students Get Bored in Class and What to Do About it
Think about the reviews you have before exams. These activities can be the most uninteresting things for students to complete, only leading to glossed-over eyes and poor test scores. But if you care about your class’ success, you can't let this behavior continue. Instead, you must make activities like reviews more fun and engaging for every student. This tactic will increase excitement and engagement amongst your students and create a friendly competition to get everyone really eager to participate.
How to Create & Play a Fun, Interactive Review Game

Use Slides With Friends! It's one of the easiest ways to run an effective, attention-grabbing review game without a ton of work on your end. We offer slide decks that resemble PowerPoint presentations with a twist: They include interactive activities that are one-of-a-kind and built to engage.
You can use a deck to build your review game whether you’re teaching or tutoring in-person or online. All you need are three essentials:
- A computer to create your game
- A monitor to present your game (if you’re doing a virtual review game, simply share your screen once it’s time to play)
- A mobile device (specifically, your students will need one to submit their answers)
We make things easy so that you can start engaging your students quickly. However, to make the process even simpler, here are step-by-step instructions on how to create a fun review game using Slides With Friends.
1. Use an Interactive Slide Deck to Play Your Review Game
We recommend using Slides With Friends to create a simple, interactive, easy-to-build, easy-to-play review game for your class. It's free to build a game and play it with up to ten students!
The first step you should take is creating a Slides With Friends account here. All you need to do is enter your name, email address, and a password.
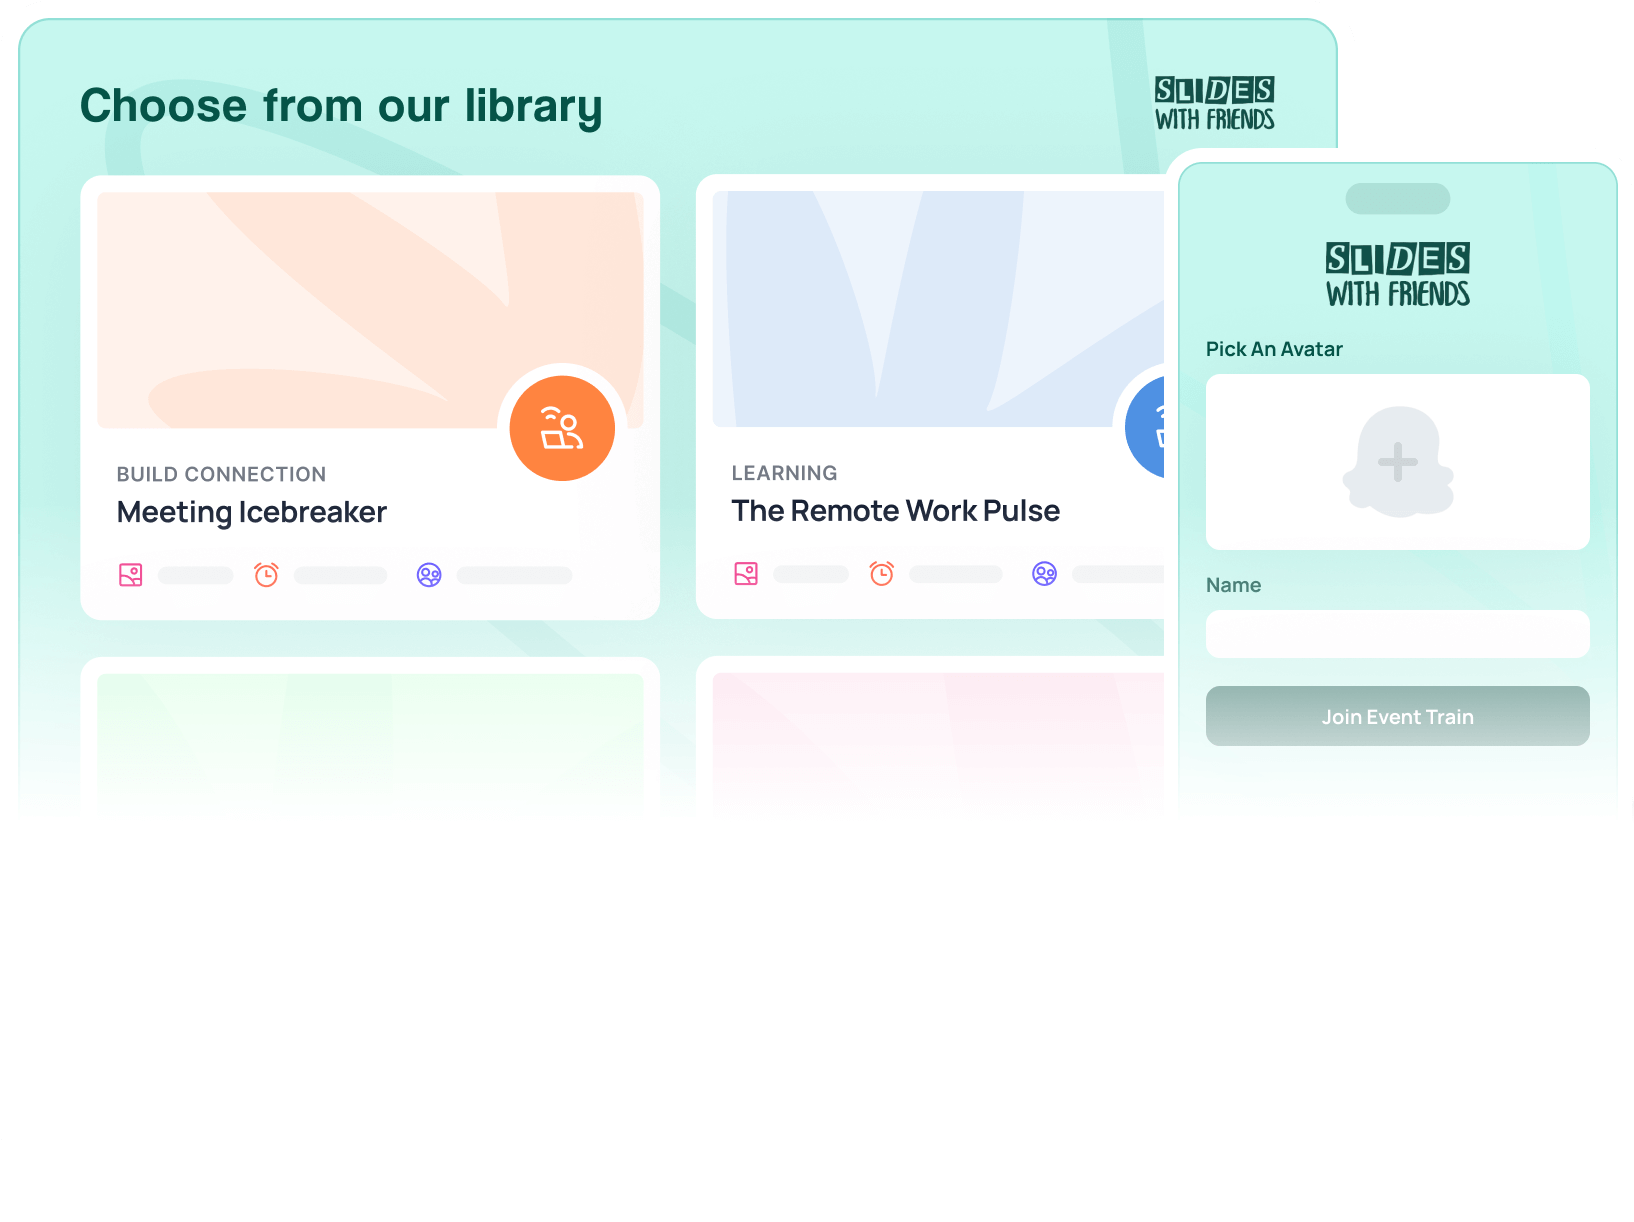
2. Choose a Deck to Start From
We'd recommend starting off from a template, so you don't have to build everything from scratch! Here's a good option, a "Classroom Review Game Template", that has multiple choice questions and text answer question question interactions already in place, with instructions on how to use them, for you to enter your own review content:

If this doesn't fit what you're looking for, or you want to start from something that already has ready to play content in it, head over to our Popular decks page, where you can search all of our pre-made review game decks! We offer multiple options that come with already-entered questions and prompts (that you can still customize).
Browse through the decks (we recommend a Trivia" type deck to start from).
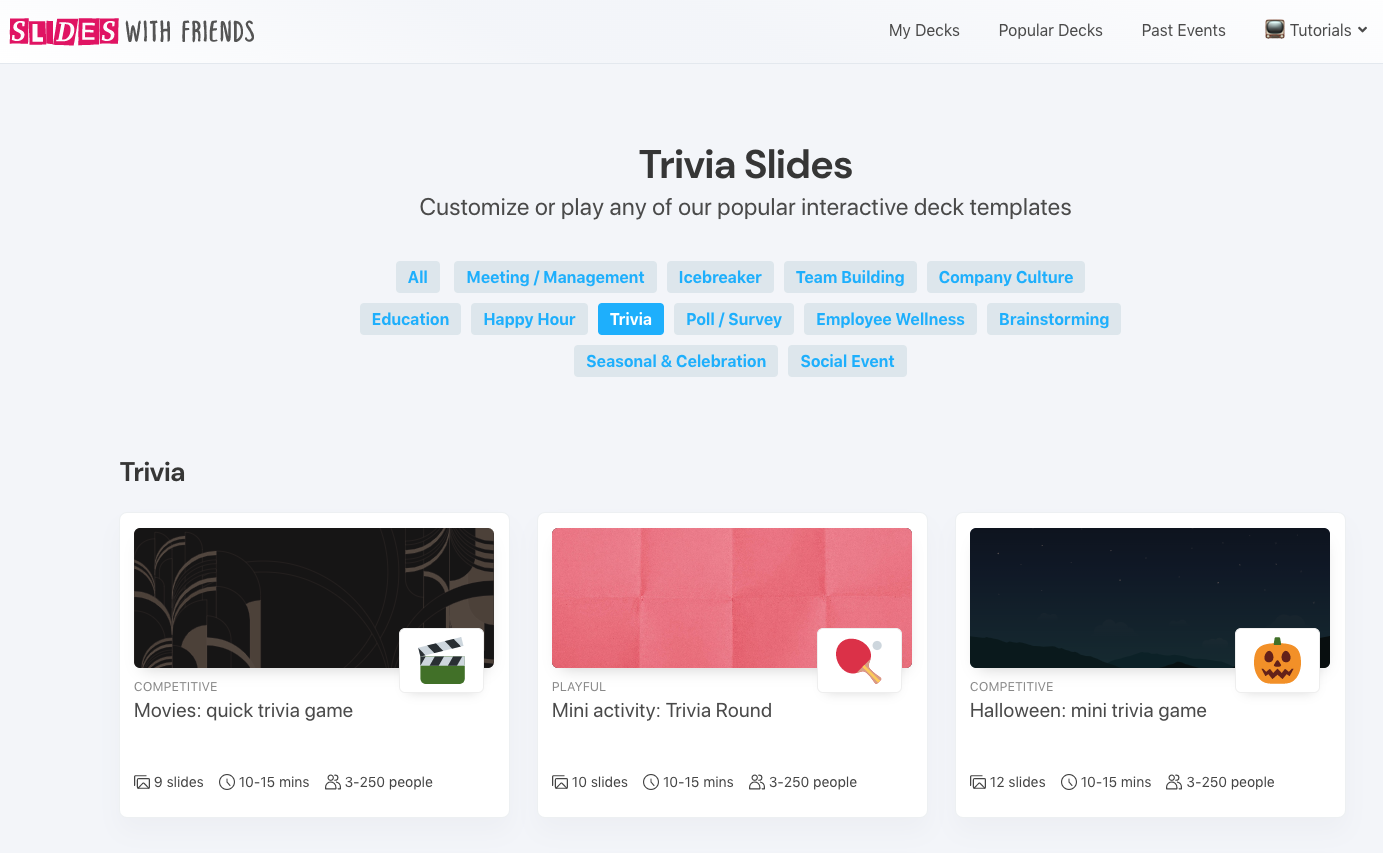
If you want to narrow your search, click on the decks to learn more about them. Doing this will allow you to see how many people can play, how long the game will last, and what kind of questions are already in the deck. After you know which one you want, click “Duplicate & Customize This Deck.”
You can also start your own deck from scratch, but for the purpose of this tutorial, let’s say you want to choose and customize a deck.
3. Customize Your Deck’s Style
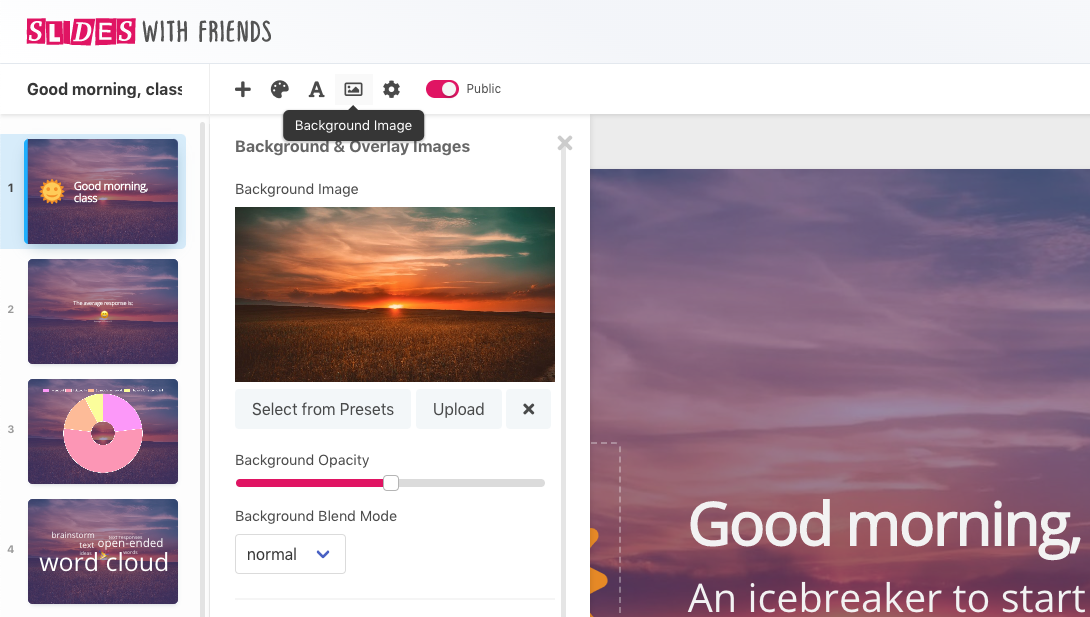
This is the stage where you get to put your hands on your review game! The first thing you should do is customize the deck with whatever look and feel you like. Use the top menu to change the background image for your slides, the font, and text color palettes.
Use the small left side menu to change the background and text colors for just the slide you're on.
Bonus, if you want to add your school logo, you can do this by clicking the gear in the top menu, "deck settings". Once there, you can add a description or logo if you have a paid subscription.
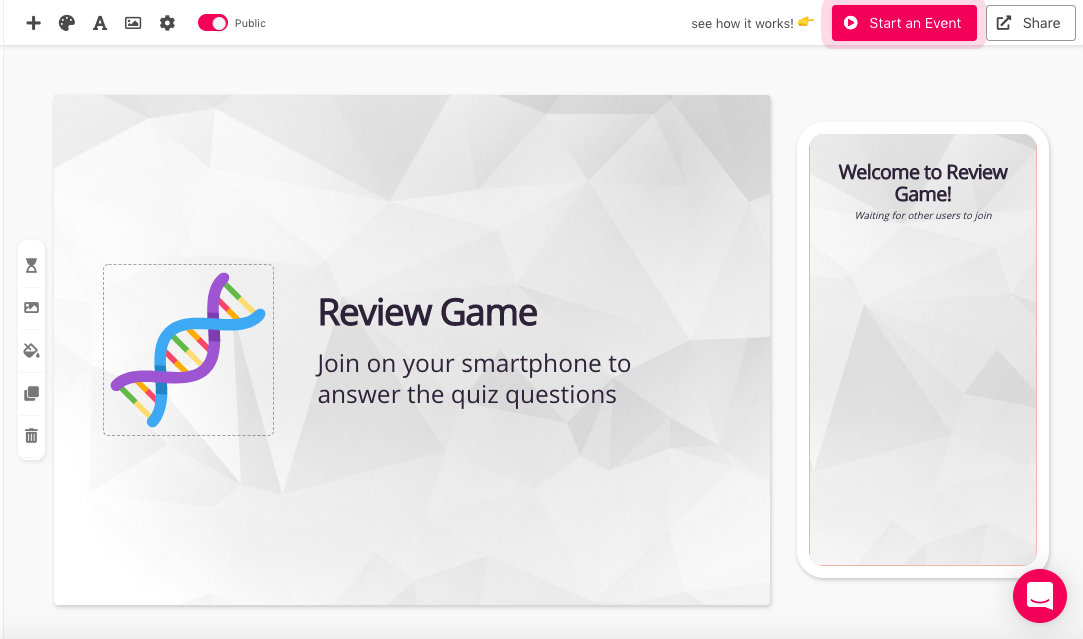
4. Change the Title & Subtitle on the First Slide
This step is simple. All you need to do is update the copy and icon on the first slide. Ideally, you should write a catchy headline to introduce your review game. Then, to choose an icon, simply click the current one on the slide, and afterward, a list of other options will appear.
Note, this emoji icon will only show for you — it's a placeholder, and in its place will be the QR code that your students will scan to join your live event.
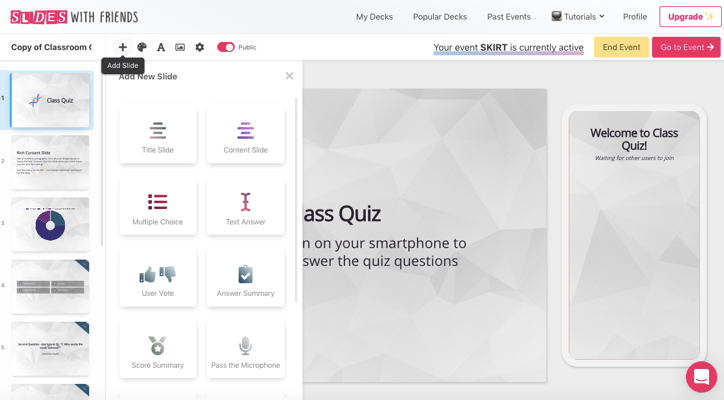
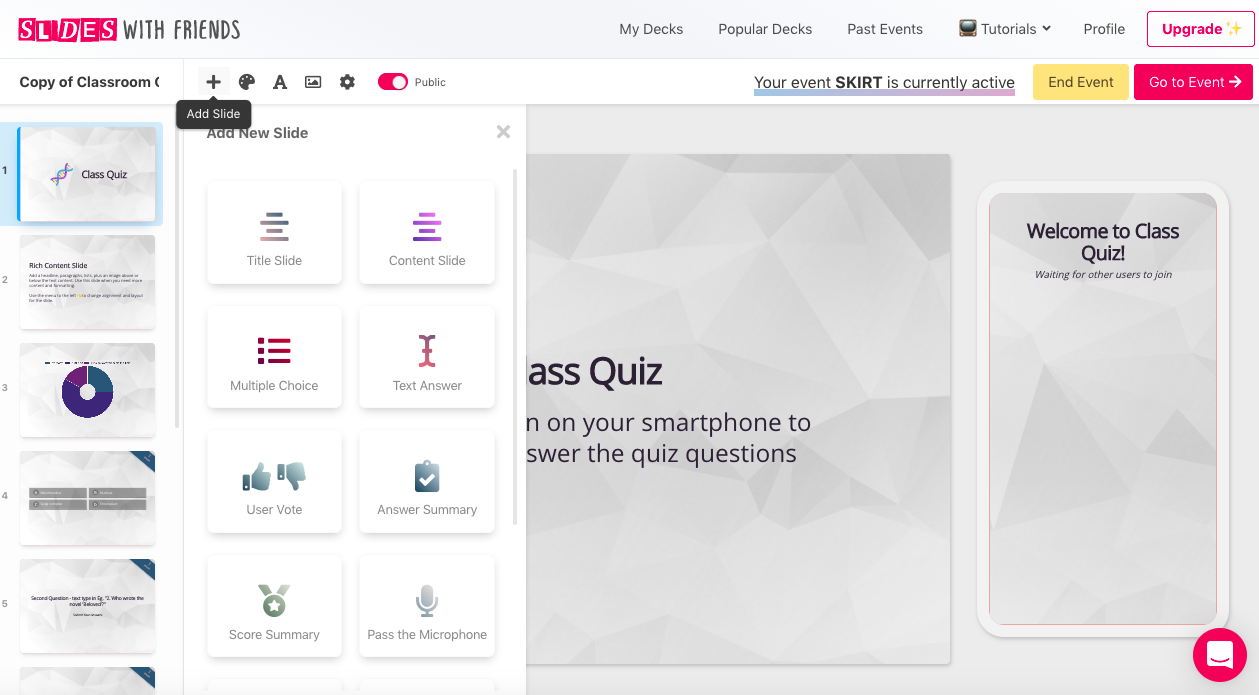
5. Add Your Questions and Prompts
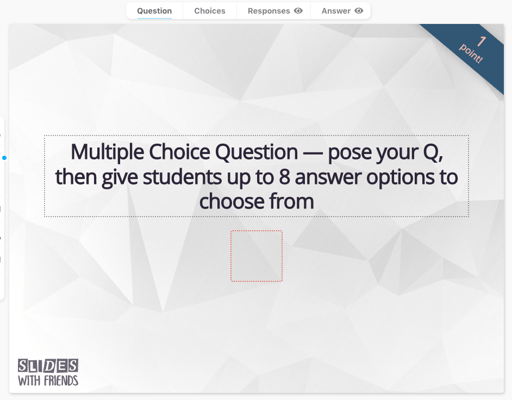
Now, it’s time to create questions and prompts for your review game. You have many interactions and functionalities to choose from, including:
- Multiple Choice Questions
- Text Answer Questions
- Word Clouds
- Live Photo Sharing
- Polls and Surveys
The main thing to pay attention to here is the top menu.
As you can see, there are four steps to each question: the "Question" itself, the "Choices" of answer options your students can pick from, the "Responses": who guessed which answer, and the "Answer", revealing which answer was correct (and which students selected it). If you don't want to show "who guessed what" step and / or the answer, just click on the little eyeball to toggle this step "off" so it won't be displayed during your review game event.

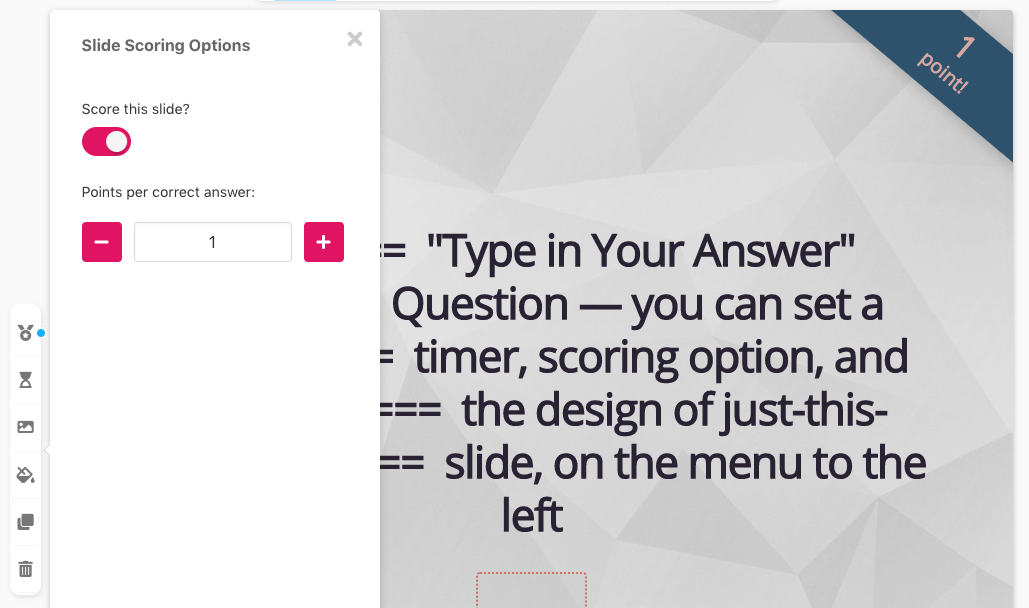
6. Add Optional Timers and Scoring
Using the left slide menu, you can determine a number of important settings for each slide.
- Top Medal: Add a poi nt value, and keep score, for all slide types that have a "correct" answer — Multiple Choice, Text Answer, and User Votes.
- Timer: Add a time limit for this slide. You can set the number of seconds (we recommend no fewer than 20 seconds) your players have to answer the question, and when the timer starts (eg. on which step of the question, step 1 being the question itself, step 2 being when the answer options or answer entry page are displayed.
- Image: set the background image for just this slide.
- Paint bucket: Change the font color and general color palette of just this slide
- Double: Copy this slide (with all its settings and styles) to another slide right after it
- Trash: Delete just this slide
7. Add Answer and Score Summary Slides
For your review game, you can choose to show answers to questions right away, or hide them all until the end. If you want to wait til the end to go over answers, you can use an Answer Summary Slide to display all of the right answers together in a row, if you don’t present them immediately after each question. Your students will see their own answer (and whether they got it right or wrong) on their own device, but this won't be displayed to the whole group.
If you want to add a little friendly competition, you can keep score by adding a Score Summary slide. This will go through the top 10 players and show their scores, from lowest to highest.
If you want to add these slides, look at the main menu top left, above your deck. Then, click the plus sign. From there, click Answer Summary. Then, repeat the process and click Score Summary.
Also, you can have multiple Answer Summary Slides. They will only display the answers to questions that come after a previous Answer Summary Slide, allowing you to create several rounds in your game.
8. Play with Your Students!
Once you’ve developed your review game, it’s time to play!
Think of this as similar to launching a Powerpoint or Google Slides presentation: you're starting a slide deck presentation and moving through each slide one at a time. The only difference is that, on the first slide, your students will be able to use their phones to join in to your presentation, and send answers directly to the questions in your review game. And the tool will automatically score the answers for you.
To launch your review game, push the button in the top right corner that says “Start an Event.”
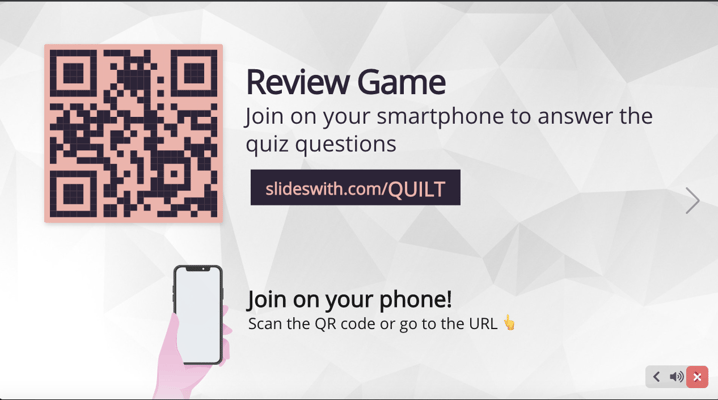
After making some "event settings" selections — like whether you want your students to be able to use the sound board that send fun emoji reactions, or to turn this option off to keep them focused — you’ll be guided to a "Join Page" that’ll allow your students to join in the game with you. This is the screen you want to display or share with your classroom on a projector, screen, or through your video call "share screen" option.

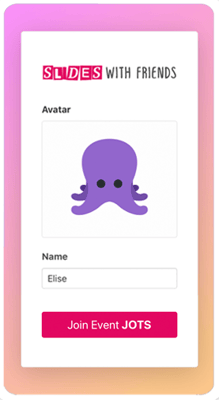
Tell your students to use their mobile devices (like a smartphone, laptop, or computer) to scan the QR code or visit the link in the box next to it. Then, they’ll be able to enter their name and choose an avatar to play:

Once you have enough people ready to go — you'll see each student join as an avatar along the bottom of the page — you can click the arrow on the right to move through your review game. Your students can send fun emoji and sound reactions, which is great for engagement, which you can always mute during the event if it gets a little too fun by hovering over and clicking on the volume button in the lower right corner to mute the noise.
Get Students Engaged with Review Games

School doesn’t have to be boring. With fun activities like review games, you can help make education enjoyable and exciting. So give your students something to look forward to throughout the semester. Use Slides With Friends to create review games they won’t forget.


More related articles


Ready to ditch the dull, and run team sessions that people will actually enjoy?
Get started with a Slides with Friends deck in no time. We’ve got all the interactive features you need in one easy-to-learn, easy-to-set-up tool.